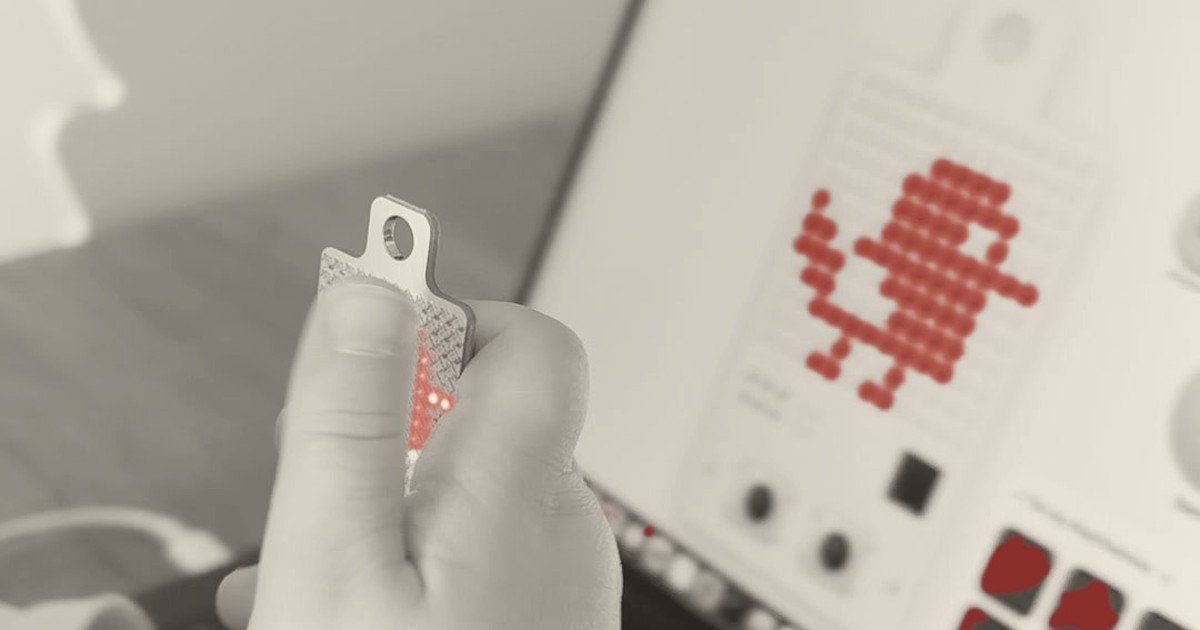
«Daddy, shall we load the fishy?»
«But that’s a birdie!»
«Yes, yes, let’s load the birdie.»
Yesterday morning I wanted to surprise my 3-year-old daughter. The idea was to have her draw some cute animated pictures and load them onto KeyChainino, to bring her a little closer to electronics and computers.
I built a web interface: a grid just like the one on KeyChainino, but digital, where she could draw anything she wanted with the mouse and then load it onto the device.
Of course, her drawings were going to be abstract. So I also added some animated pictures of animals and other things, ready to pick and load onto KeyChainino with one click.
But maybe I should take a giant step back, to 2015, when this thing I called KeyChainino was born. I know. It’s a questionable name – we’ll get there. But above all, what on earth is KeyChainino?
I was waiting at the bus stop and, without even noticing, I was fiddling with my house keys to kill time. As I ran them through my fingers, an idea flashed into my mind: why not make an electronic keychain for when you’re bored?
Back then social media already existed, but there was no endless scrolling from one reel to the next. You checked in now and then, to see what your friends were up to and be a little nosy about other people’s lives.
But to understand where that idea came from, I have to go back even further.
I’ve always loved tinkering with electronics. I liked playing with LEDs and microcontrollers. It was my father who brought me into that world, starting with electricity. Then, on my parents’ advice, my aunt and uncle gave me a kids’ kit for exploring electronics: diodes, light bulbs, all kinds of circuits, batteries.
The passion grew stronger in high school, where my teacher, Professor Pipitone, taught us to program PIC microcontrollers in assembly. I don’t know if you’ve ever tried it, but it’s a language very close to machine code, and very complex. You can only add and subtract, with bare-bones instructions like GOTO and lines of hexadecimal: before writing them, you even had to do the math to be sure the code would go where you wanted.
A PIC is a microcontroller you can load a program onto, which then «translates» it into actions in the real world. It can read an input that is high or low (5V or GND, that is, 1 or 0 in machine code), and it can drive an output at the same levels to control an LED, a transistor, a relay, a 7-segment display, a buzzer… you get the idea :)
I loved this microcontroller so much that I wanted to bring something built with it to my final high school exam. I started thinking about a complex project: a serial interface with the computer, whose data was decoded by the PIC and then shown in binary code by lighting up different LEDs.
When I presented the idea to my teacher, he told me he thought I was getting it wrong. The examining board was mixed, with other teachers who wouldn’t understand a thing about electronics. According to him, I had to present something that «lights up and makes noise». Only that way would I impress the board.
I took his advice and built PIC-TONES: an electrical junction box with 5 LEDs and 5 buttons on top, which recreated the Simon memory game, sounds included.
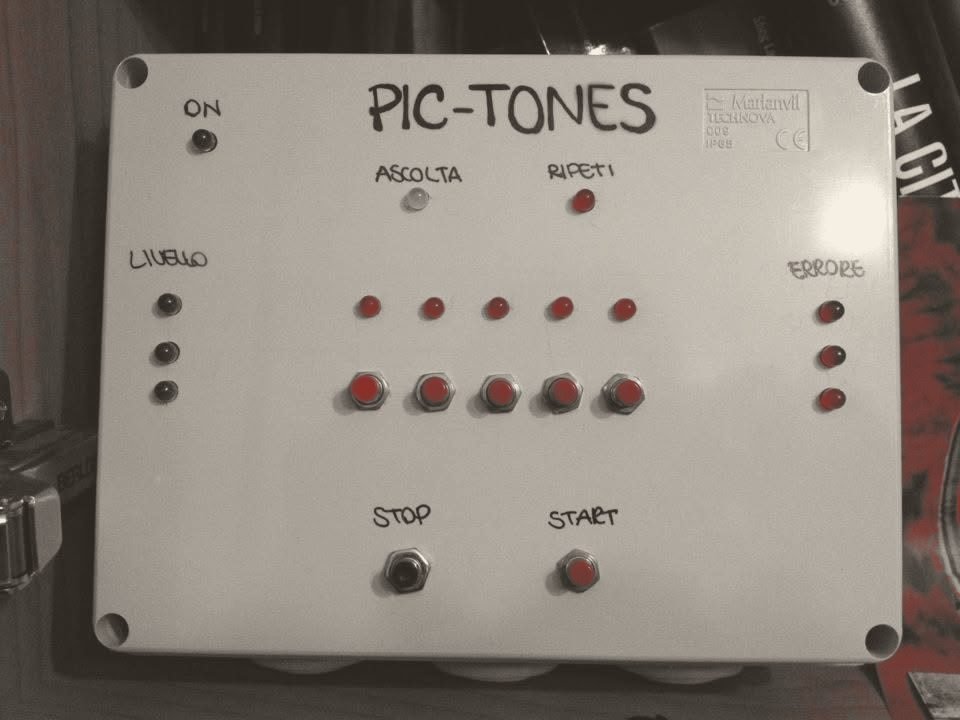
Generating the sound was the hardest part. The code was written in assembly, and there were no ready-made PWM (Pulse Width Modulation) functions to drive the buzzer directly and play a precise note. In practice, I had to switch it on and off hundreds of times a second: the faster I did it, the higher the note. So I wrote an interrupt loop that generated a square wave with a variable frequency, to change the note. I started from A, which vibrates 440 times a second (440 Hz), and from there I wrote all the notes, until I had a little tune that came together as you pressed the buttons and that – once you guessed the whole sequence – played the entire song.
I still remember that, to find all the notes, I first connected a potentiometer to one of the PIC’s inputs: I generated the different frequencies, tuned them against my little keyboard and wrote down the values it gave me.
My teacher was right: every member of the board, even the literature teachers, loved it!
A few years later I discovered the thing that revolutionized electronics for hobbyists, and beyond: Arduino. An Atmel chip (now Microchip) on a board with the pins right at hand for prototyping. The real revolution, though, was the programming environment (the so-called IDE) and its language, very easy to use.
From that moment on, Arduino has been – and still is – the board I use to make small electronic projects, for fun and beyond. From the LEDO lamps (maybe I’ll tell you about them one day) to KeyChainino: a keychain made with Arduino. Keychain + (Ardu)ino = KeyChainino.
I know. Even I still don’t know how to pronounce it. Not even the people who interviewed me about the project knew how to say it, and it always ended in laughter.
Yes, OK, all very nice. But what is KeyChainino?
It’s a small keychain, programmable with Arduino, with retro arcade-style games inside. It works with two buttons and a special «display»: in the first version, 30 LEDs. No screen. Just red LEDs. ’80s style.
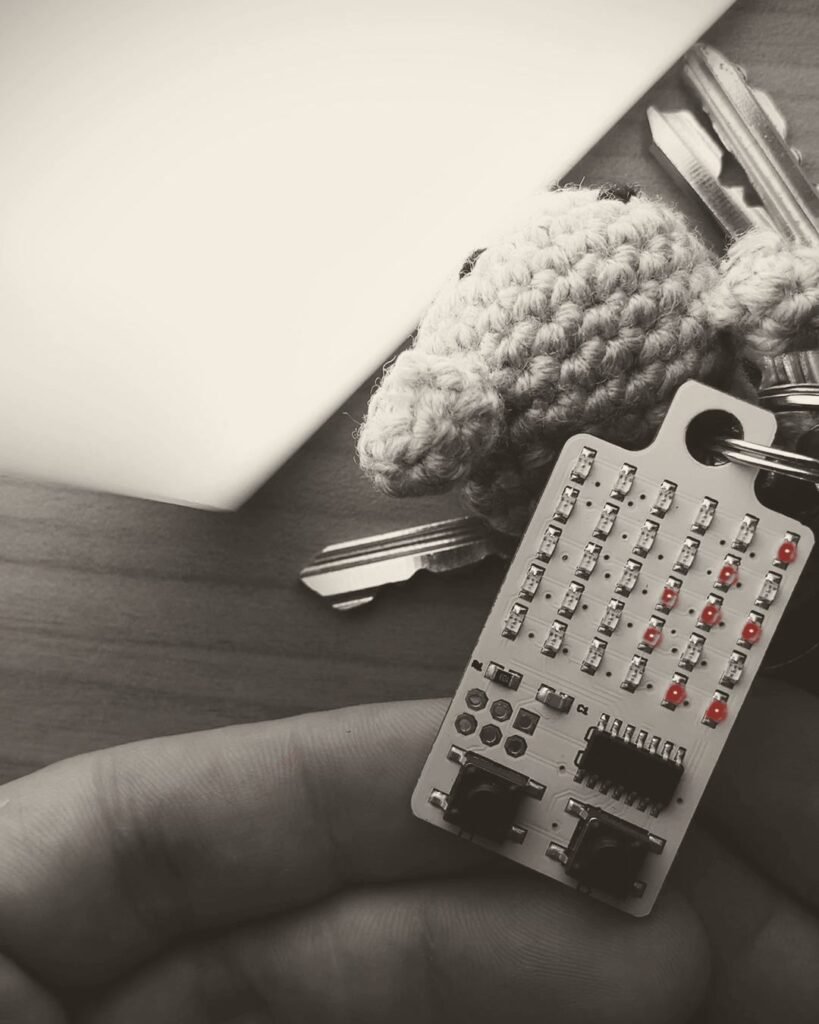
When I came up with the project it seemed fantastic to me – yes, I know, I’m a nerd. But the first problem showed up right away.
The keychain had to stay small: I could hardly walk around with a 10×10 cm board hanging from my keys. That’s why I had chosen an Atmel microcontroller, the ATtiny84: 14 pins, of which only 11 could be used as inputs and outputs.
I did a quick calculation: 30 LEDs, 30 pins. Plus 2 buttons: I needed 32 pins. I only had 11. Now what?
«Let’s change the microcontroller», I thought. But I couldn’t find one with that many pins that I could solder onto such a small board with the tools I had.
I gave up on the project.
Time went by. Browsing electronics websites, I came across a multiplexing technique I didn’t know: charlieplexing.
Charlie-what?
It’s a way to control lots of LEDs with just a few pins. It looks like magic, but it’s pure electronics. It’s based on a precise principle: a microcontroller pin can have 3 states. ON (1), OFF (0) or the THIRD STATE. And this lets you drive up to 6 LEDs with 3 pins.
Wait a second.
Until then, I knew that a digital output on a microcontroller could only have two states, ON and OFF. And now they’re telling me it has another one? What is it, antimatter?
That’s how I found out that the third state is simply «high impedance». If you set that pin as an input instead of an output, it can neither sink nor source current: it effectively becomes an open switch. LEDs, for their part, only conduct and light up with a certain polarity (positive on the anode and negative on the cathode). Wire them up the right way and you can control 6 LEDs with 3 pins. (I went into more detail in this article.)
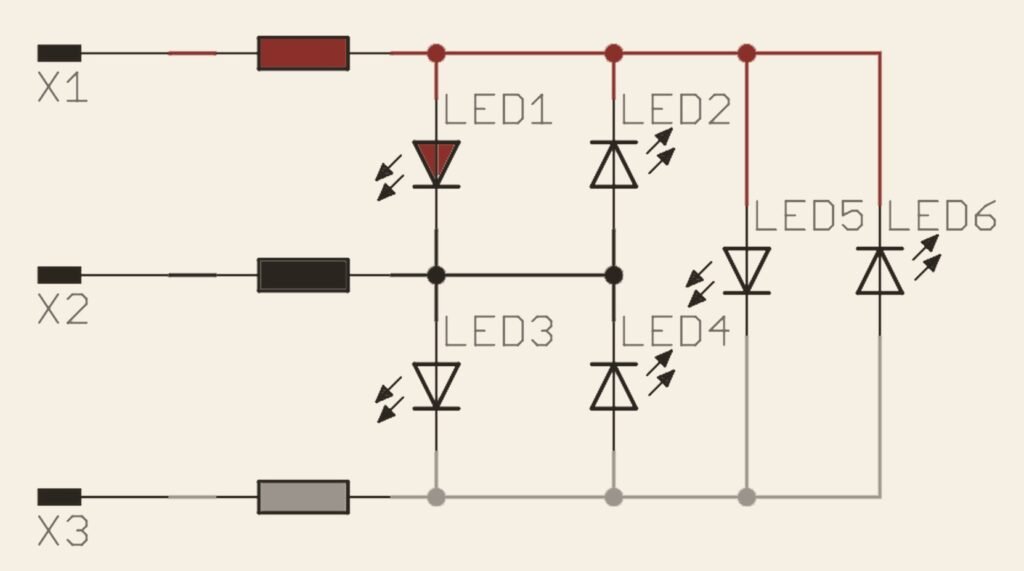
With this technique I could power lots of LEDs, following this formula: number of LEDs = pins x (pins – 1). So with 9 pins (the other 2 were for the buttons) I could drive up to 72 LEDs! More than enough for my 30 LEDs, in a 6×5 matrix (the screen): 6 LEDs across and 5 down.
Great, you’ll say. Not quite. This is where the fun begins.
Like every magic trick, this one has its Achilles’ heel: you can only light one LED at a time. How do you make a game if your «display» lights only one?
Luckily, the human eye is faulty :) The retina can’t tell that an LED is switching off and on very fast, so it sees it as always on. It’s the same principle as PWM, the one used to dim LEDs: they switch on and off so fast that the eye doesn’t notice, and just sees a dimmer light.
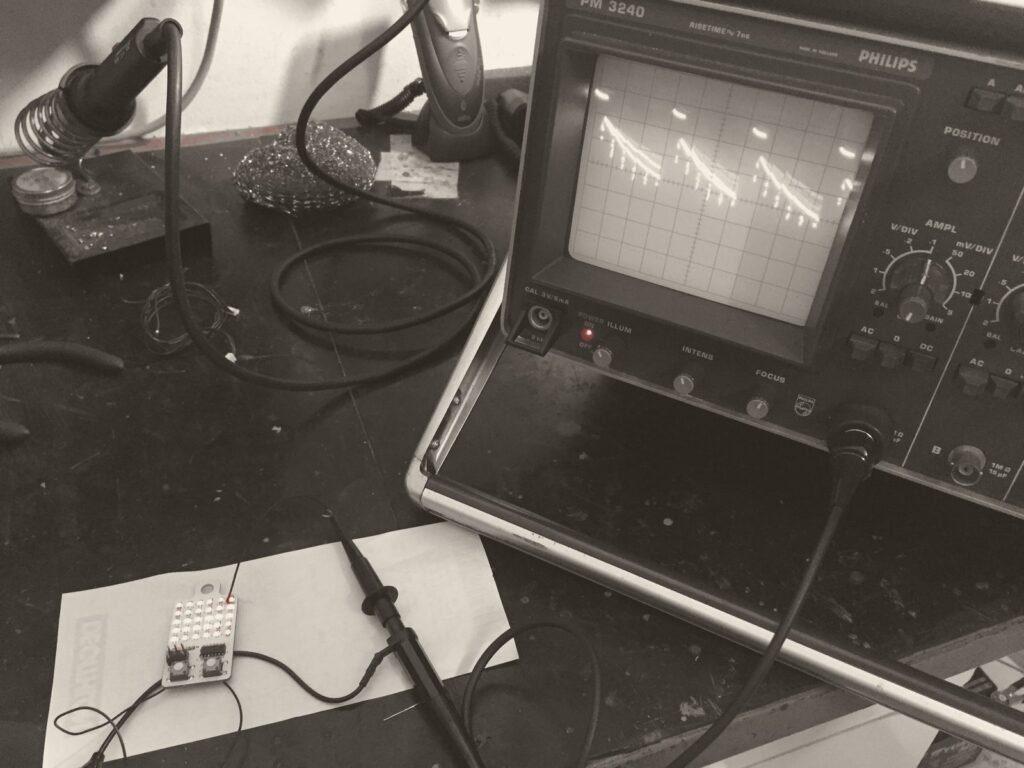
So I had to light one LED at a time, but so fast that, by the time the last one lit up, the eye still saw the first of the 30 as on.
It took a while to tune the refresh rate, but in the end I made it: the first KeyChainino was born, with the game Arkanoid.
It was a hit on social media and in electronics forums. Even the Adafruit blog and Atmel’s wrote about it. It was a cool keychain for true nerds. Something that lights up, just like Professor Pipitone wanted.
Lots of friends asked me if I could build them one, and they were even willing to pay for it. So I decided to make a first batch of 100. The first ones were made entirely by hand, and I sold them all.
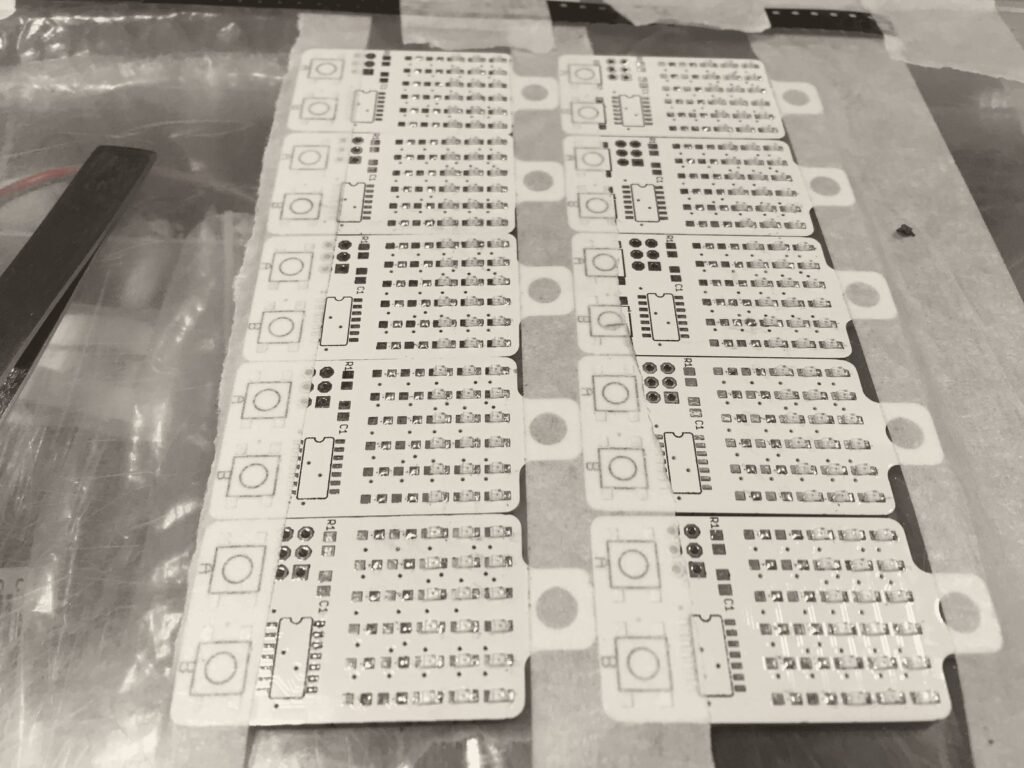
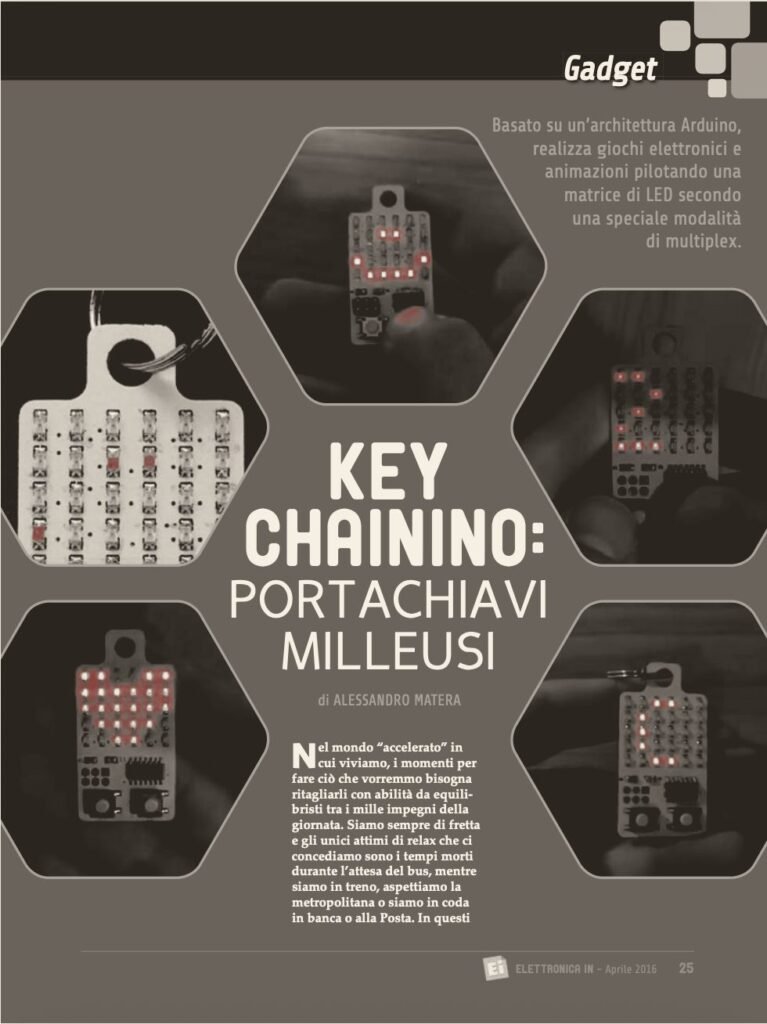
That first version also led to a partnership with Futura Elettronica, which started reselling the keychains. And in April 2016 I also wrote an article for their magazine, Elettronica In.
At that time I was also spending a lot of time at FabLab Catania, where I ran a few Arduino workshops and where we designed Dr-Jack, the life-saving device. But that’s a story for another time too.
Working in that lab, I realized there also had to be a version you could build with your own hands, like the DIY kits that used to come with electronics magazines. That’s how the THT version of the first KeyChainino was born, to assemble yourself, IKEA-style. I sold a few dozen for courses and to other FabLabs in the network.
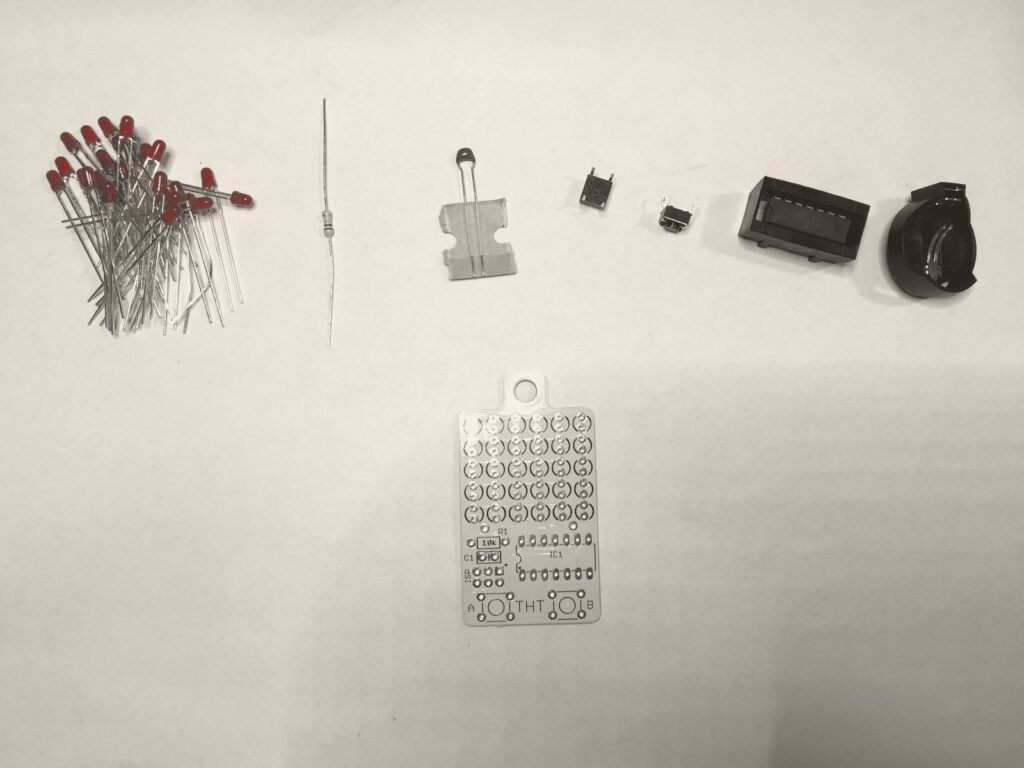
This board, though, had a drawback: to program it you needed another Arduino, with jumper wires connected to the different pins. Not as simple as plugging in a USB cable.
What if I made it USB?
Riding the wave of success, I decided to make a version with a bigger LED matrix, 8×8, and an Atmel ATmega32U4 microcontroller, which can be programmed directly over USB with the Arduino IDE. You plug it into the computer like a USB stick, and off you go. That way I would lower the barrier to entry a lot. I was thinking of kids who wanted to learn how to program chips and put it into practice right away with KeyChainino USB.
During development I realized that going from idea to product wasn’t as easy as I’d imagined. I wanted to keep the keychain the same size, and fitting 64 LEDs into the space of 30 meant making the LEDs smaller. The chip, what’s more, couldn’t be soldered with traditional methods. And the CR2032, the classic coin battery you find in car remotes, didn’t last as long as I needed, so I decided to use a rechargeable one. All of this required a precision that only electronics factories could have, or that I, at least, couldn’t match.
So I had 10 prototypes made in a factory. It was my first experience with companies that assemble electronic boards. Until then I had only had the PCB made, that is, the board all the components are then mounted on. Managing the whole pick-and-place with a factory (the machines that pick up each part and put it in its spot on the board) is something I had to learn along the way.
When the prototypes arrived at my house they were beautiful. But I was terrified they wouldn’t work.
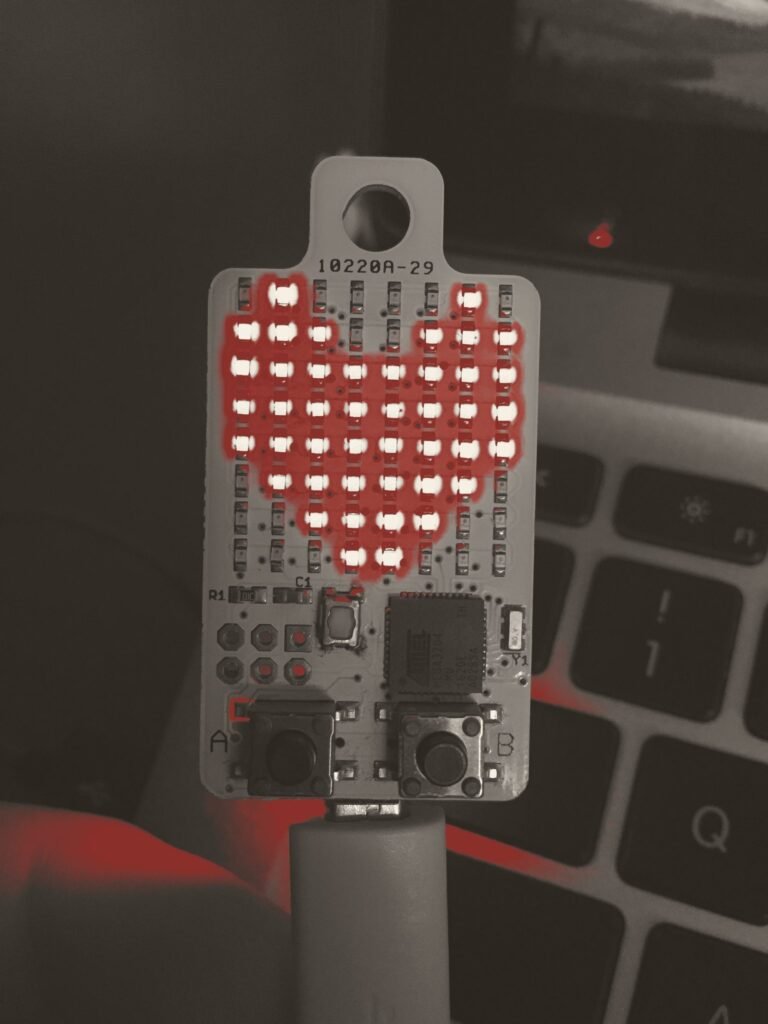
First I loaded the bootloader onto the microcontroller: it’s the first piece of code, the one you need to then load all the other sketches (Arduino programs) over USB. It all went fine. So I decided to load Arkanoid, which I had adapted to the new display.
Silence.
I won’t tell you how many curses I sent to the factory, and to myself. I knew I’d gotten into something bigger than me, without the slightest experience.
Then I noticed that the USB cable was damaged. I swapped it, the program loaded and, to my great surprise, the display lit up with the game ready to start. One of the greatest satisfactions of my life!
But, as we say in Italy, not every doughnut comes out with a hole.
The power system I had chosen didn’t work: the battery lasted only one day, and I didn’t want to change the board layout to fit a lithium one. On top of that, the cost of the components and of the factory assembly was really out of reach for so few pieces. A price no nerd would have been willing to pay.
I slept on it. A night that lasted two years. The project was put on hold.
In December 2019 I decided to make another 64-LED version, but with the same chip as the original version, the ATtiny84, in a smaller package that let me keep the size of the keychain. But I had to give up USB. This version was produced in just a few batches and, unlike the first one, it never took off, even though I managed to keep the same price.
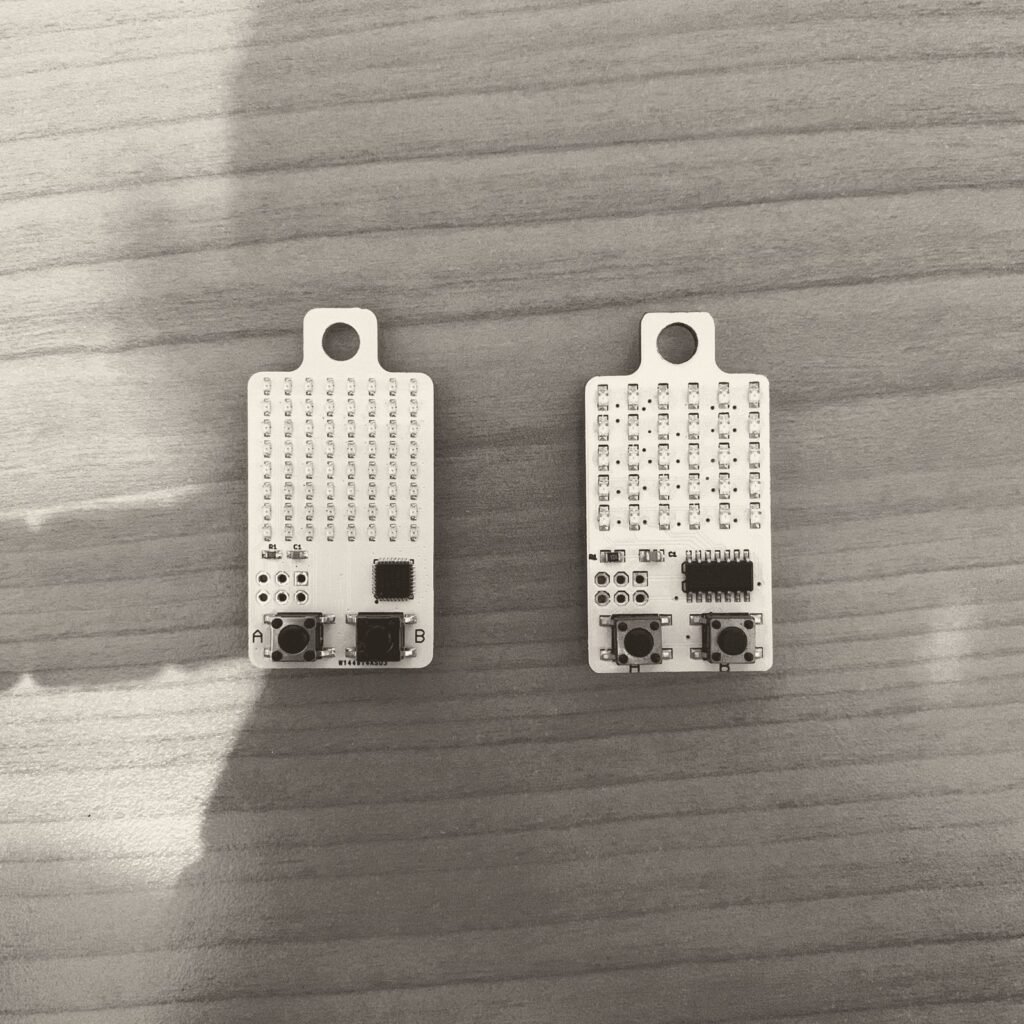
In those years I also made other versions of KeyChainino, a round one and a second THT, but I never put them on sale. And the project went on hold again until 2021, when another idea flashed into my head.
KeyChainino wasn’t a niche product. It was a super niche product, for lovers of pure electronics. To reach arcade game fans too, I had to make it more playable. So I decided to bring the «display» up to 144 LEDs, while keeping the size of the first KeyChainino.
To do that I had to make the LEDs even smaller. I placed them at 45 degrees on the board, to use every bit of available space, and I switched to the tried-and-true ATmega328, which has plenty of pins for charlieplexing. And so, in 2021, KeyChainino 144 was born, with Arkanoid preloaded and other games you could load by hand.
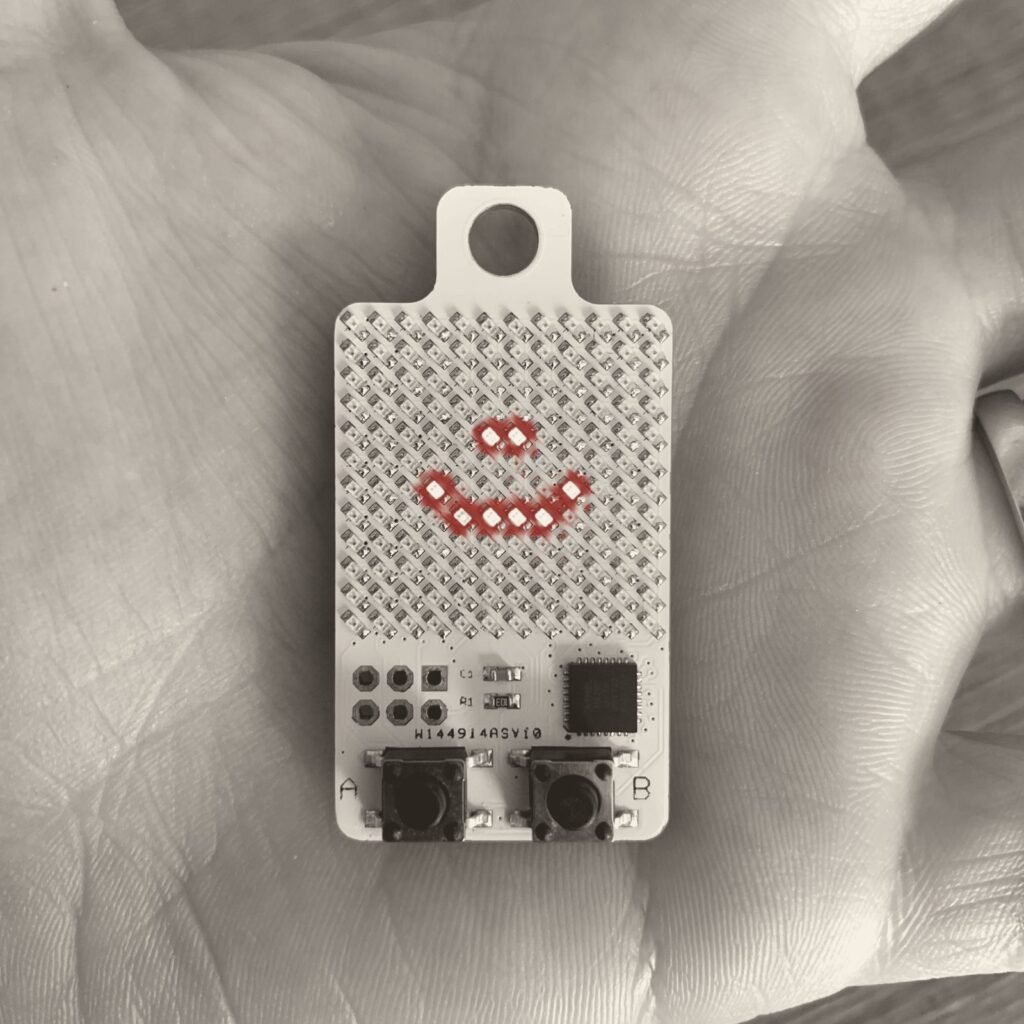
It was a success from day one. I’ve sold more than 1000 of them, to nerds who love electronics and arcade games all over the world. They sold steadily, but slowly: I had them made 100 at a time and, between one batch and the next, whoever wanted one joined the waiting list.
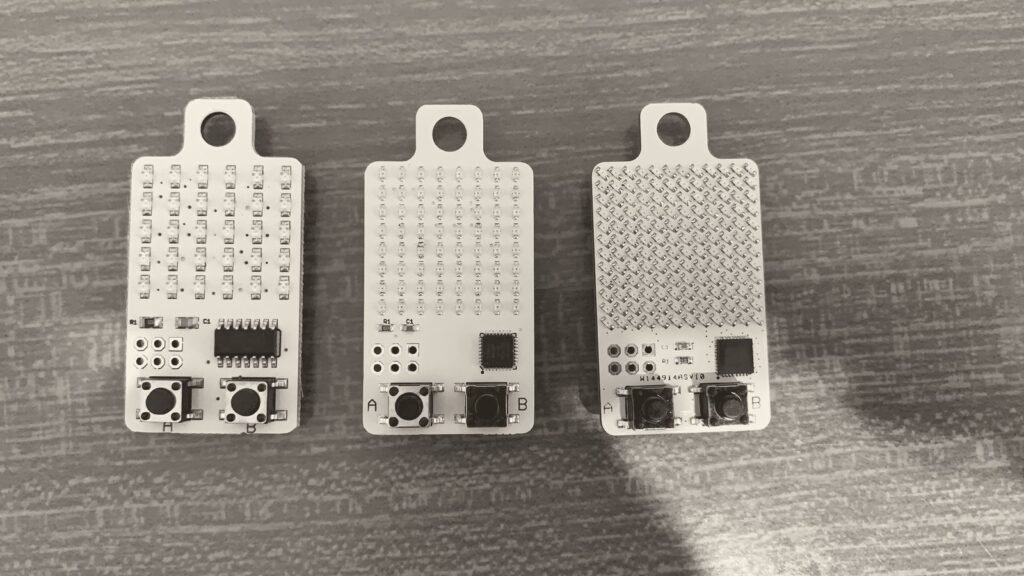
Still trying to make it more playable, and since many people asked for more games on the same device, I tried to write code that would allow it.
I immediately ran into the chip’s memory, which wasn’t enough. Much to my regret, I couldn’t make a multi-game sketch.
Then, in 2023, generative AI started to take off, and I tried using it to improve my code and solve the problem. Not even AI could do it.
I thought: well, sure, maybe it can fix a few pieces of code. But it will never write all the code for hardware this complex, with constraints this tight, like KeyChainino.
Until this year, when I tried again with Claude Fable 5, a model by Anthropic. It took about an hour to write the code.
I loaded it straight onto KeyChainino, without reading a single line. I already knew that, just like in the past, it wouldn’t even compile.
Instead, to my amazement, the code compiled. And not only that: the multi-game actually worked. On the first try!
It had optimized the memory of all the games I had made and written new ones from scratch: 17 games in total, on the same KeyChainino.
That was a real wow moment. Even though, for the first time in my life, I felt humiliated by a machine.
After the initial shock, I understood that this was the way to do it. That AI is a support, and that you don’t need to know how to write all those complicated lines of code. Sure, maybe writing them is fun. But AI is an incredible help, and it lets you speed everything up.
I would never have dreamed, for example, of building a web interface for KeyChainino for my daughter. It would have taken me months.
And so we finally come back to the start of this story: to yesterday morning, when I asked AI to build a web app designed for a 3-year-old girl, to draw and pick the pictures to load onto the keychain. To bring her closer to electronics, the way my father did with me.
Claude built it in 10 minutes.
I decided to make it available to everyone, on the KeyChainino website.
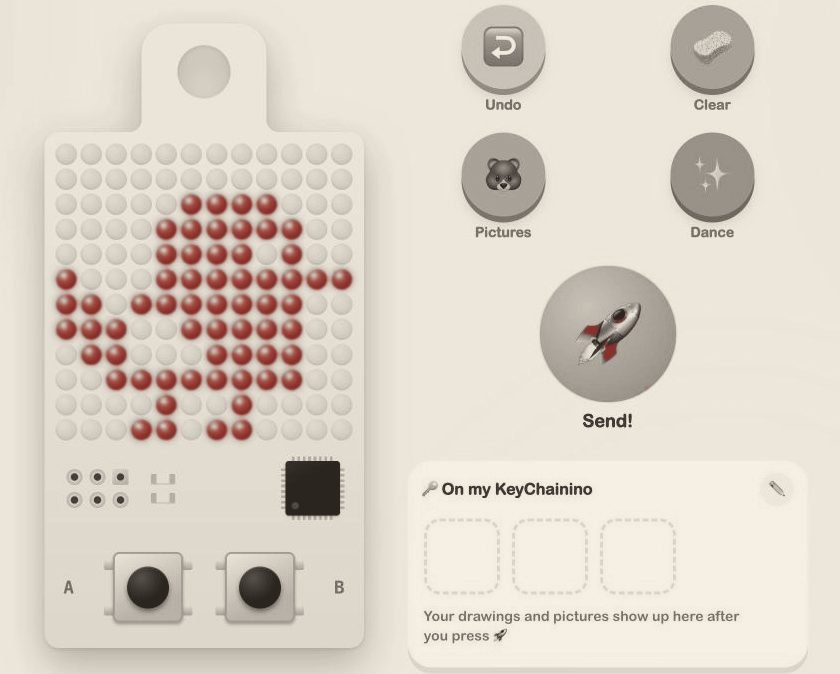
And in the end, we did load the birdie.
My daughter’s smile will stay printed in my memory forever.
Leave a Reply