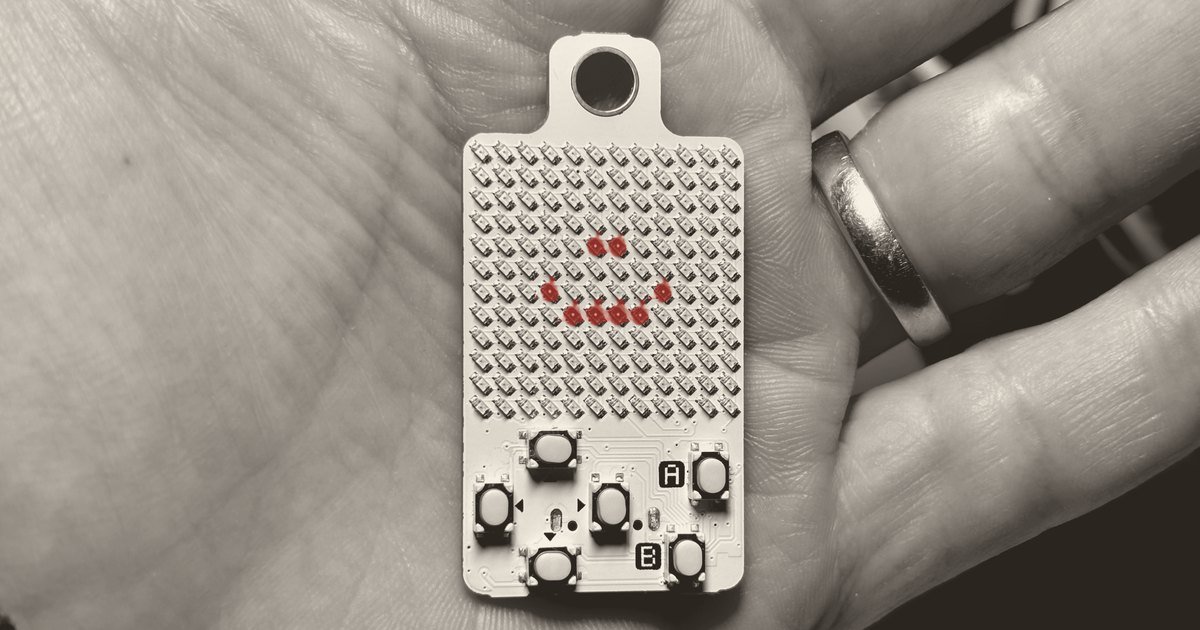
I don’t mean giving ideas or suggestions about which components to use. I wondered whether AI could design a PCB, a printed circuit board, from the electrical connections to the «routing» (the copper traces that join all the parts), all the way to a finished product.
I’ve already told you about KeyChainino, the programmable keychain I made, with a matrix of 144 LEDs instead of a display.
After getting beaten by AI at programming the chip (it wrote the code to fit lots of games on the same board, something I thought was impossible), this time I asked Claude for a new board. The same LEDs, but with a USB connection to load the firmware, more buttons to make it a full gamepad (the 4 arrows plus A and B) and a buzzer.
I had already tried this in the past, but back then AI only got as far as the electrical connections, and the board layout was a disaster. A few months later, seeing the giant leaps frontier models have made, I wanted to put it to the test again.
So I gave it some very specific requirements:
- a maximum budget;
- powered by a CR2032 coin cell;
- very low standby consumption, because I didn’t want an ON-OFF switch;
- a chip with native USB, without any extra chips;
- 144 LEDs to drive, like the matrix of the old board;
- 6 buttons in total (D-pad plus A and B);
- a buzzer;
- all in the same form factor as KeyChainino 144.
I was ready to laugh.
I ended up crying.
The first thing it did was show me a render of what the board would look like, to check that everything fit. It also suggested making it bigger, so there’d be more room, but I didn’t budge: the size couldn’t change.
Once we agreed on that, it went looking for the chip. It had to be very cheap, to stay within budget, but still have good documentation, so it could be programmed properly.
After weighing several chips with enough pins for all the inputs and outputs, it picked the CH592X: good firmware support, native USB and built-in Bluetooth.
A bit of GPU work later, the model also analyzed my old boards, including the USB version that never got past the prototype stage. From that one it took the idea of adding a MOSFET, so the USB connection could be used without removing the battery. (Note for my electronics friends: a diode could have done the job, but its voltage drop would have been too high for a 3V CR2032.)
Once it had a first shortlist of components, it showed me the options with their pros and cons, and suggested which way to go.
It proposed red LEDs – of course, like on every other KeyChainino, because they need a lower voltage than other colors – and a range of buttons in different sizes. We also discussed the actuation force, which has to be just right for gameplay.
It placed everything on the board and started to «untangle» it, that is, to draw the traces.
About 15 minutes later, using KiCad from the command line, it told me:
«The board is too small for automatic routing.»
You don’t say?
«If you want, we can make the board bigger.»
No.
«Or…»
Or…
«…I can route it manually, but to do that I need to write some scripts.»
Write all the scripts you want, dear Claude: today we’re building this board!
After an hour of work, and a few comments from me (the traces had to be all parallel, with no 90-degree angles), it was done.
And as output it gave me this image:
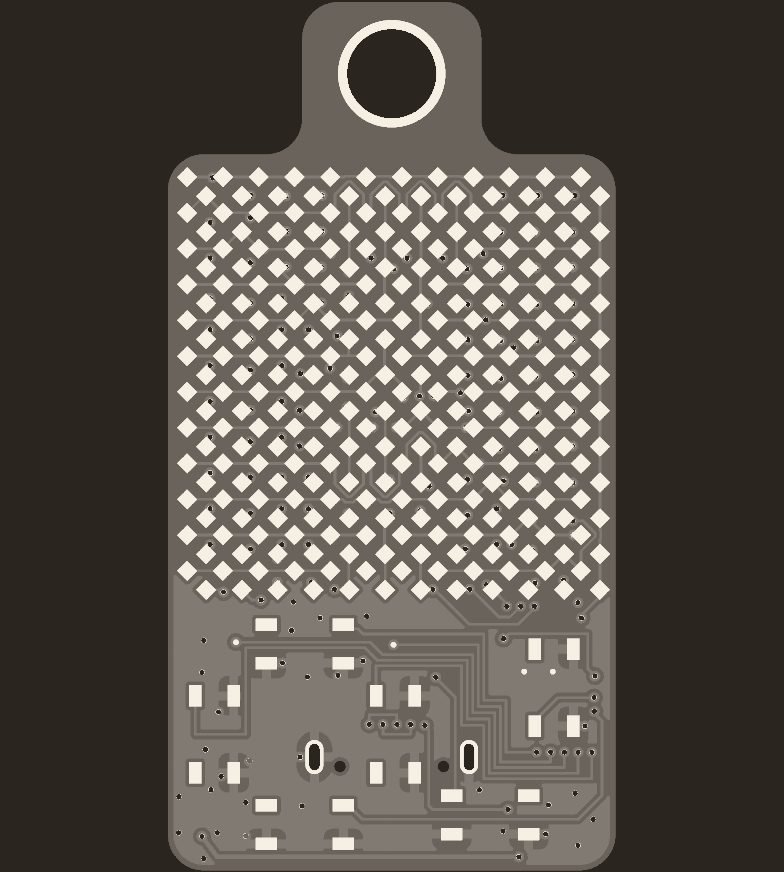
I sat staring at the screen for at least 5 minutes.
Claude had managed to design a circuit board from scratch. And I’m not talking about Fable 5.2, the model that just came out and was marketed precisely because it can design hardware. I’m talking about Opus 5.5, released in September.
I had it make a few changes, then I asked: «Can we also add an antenna for Bluetooth?»
The first answer was, as always, a whiny one :)
«There’s no room on the board for an antenna.»
Check again.
«I checked: it’s not possible to put a trace antenna on the PCB. But if you want, I can find room for a ceramic antenna.»
Go Claude, go: put in the ceramic antenna.
«The cost, though, is $1 per part.»
Hoooow muuuuch?????
If I wanted to build a single board, the price would be negligible. But on 100 pieces that’s $100 just for the antenna. Not sustainable. Still, since there’s no other room, let’s stick that antenna on, at least on the first prototypes. Then we’ll see whether to keep it.
It took a while, because an antenna needs an area with no ground and no components, on both sides of the board. But in the end it found the spot, and placed the ceramic antenna there.
Then, without me asking, it ran an RF analysis of the board, to make sure the antenna resonated at 2.4 GHz, the Bluetooth frequency.
Check passed. The board is ready.
«Do you want me to panelize it?»
A tear rolled down my cheek.
Usually the factory that makes the boards handles them one by one. If you panelize them instead, that is, put them together in a single panel, you save on PCB and assembly costs.
And it did that too.
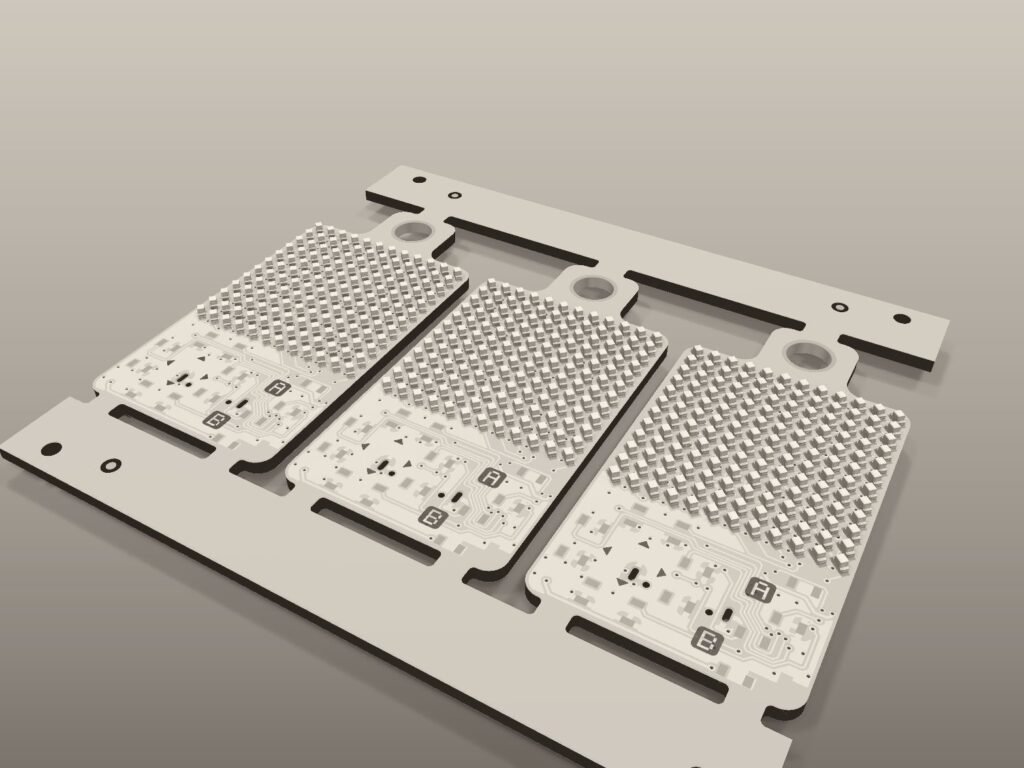
«Do you want me to send them to the factory?»
Want to make me a coffee too? :-D
Wait, wait, champ. Sure, you made me the board and my jaw is still on the floor, but are we sure it works? Do one thing: start working on the firmware, then build a simulator of the chip and the board, and let’s see if it all runs smoothly.
So how do you think it went? Smooth as butter.
It thought of everything. The B button, which also had to get you into the bootloader (B for Bootloader) when you plug in USB to load the program. Power consumption, which registers to turn on and which to turn off in standby.
It designed the hardware and the software from scratch.
But would it work?
There was only one way to find out. Claude ordered the board, suggested the answers to give the technicians when they had questions, and today the boards arrived.
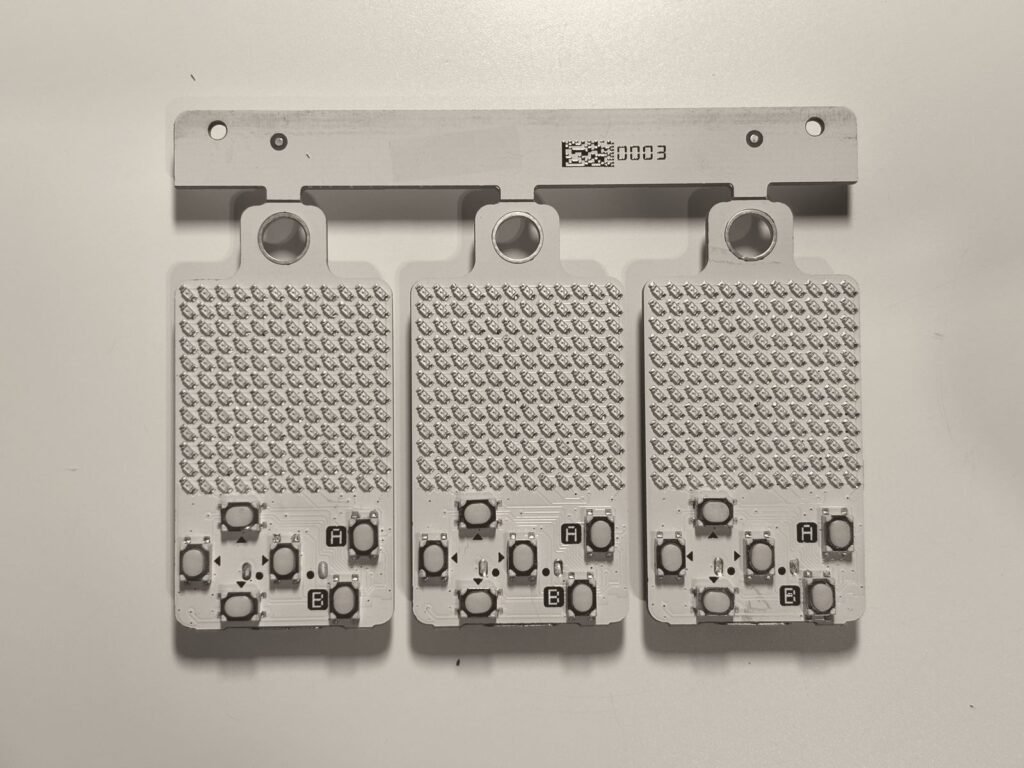
The KeyChainino is just as I expected. Actually, even better!
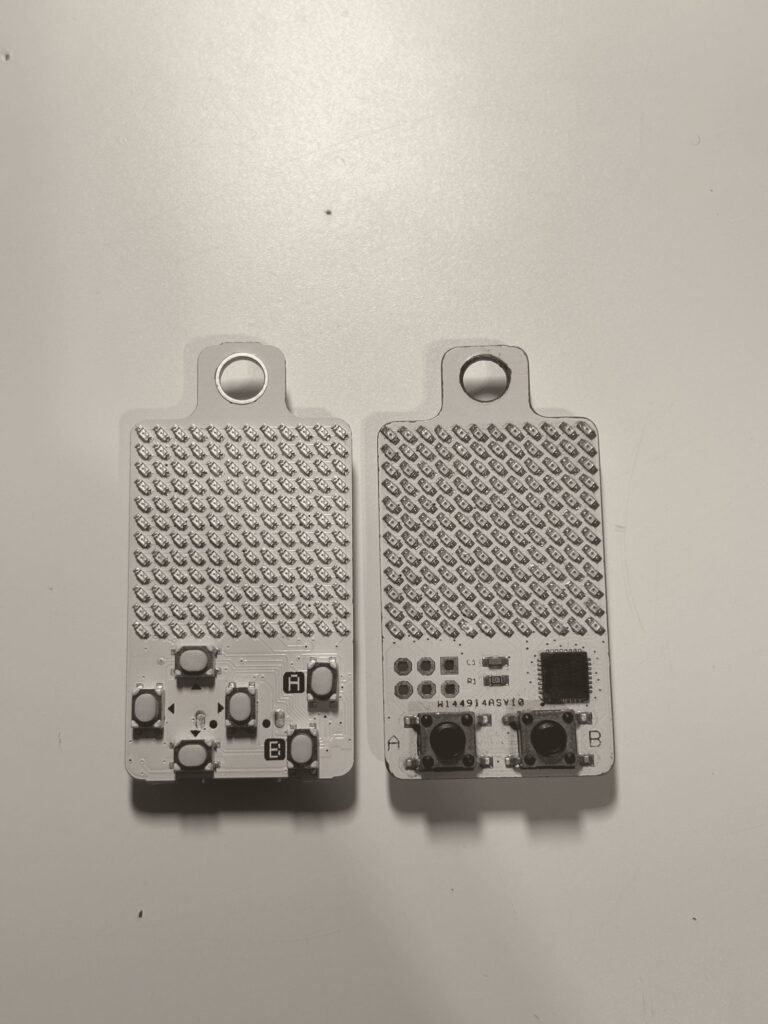
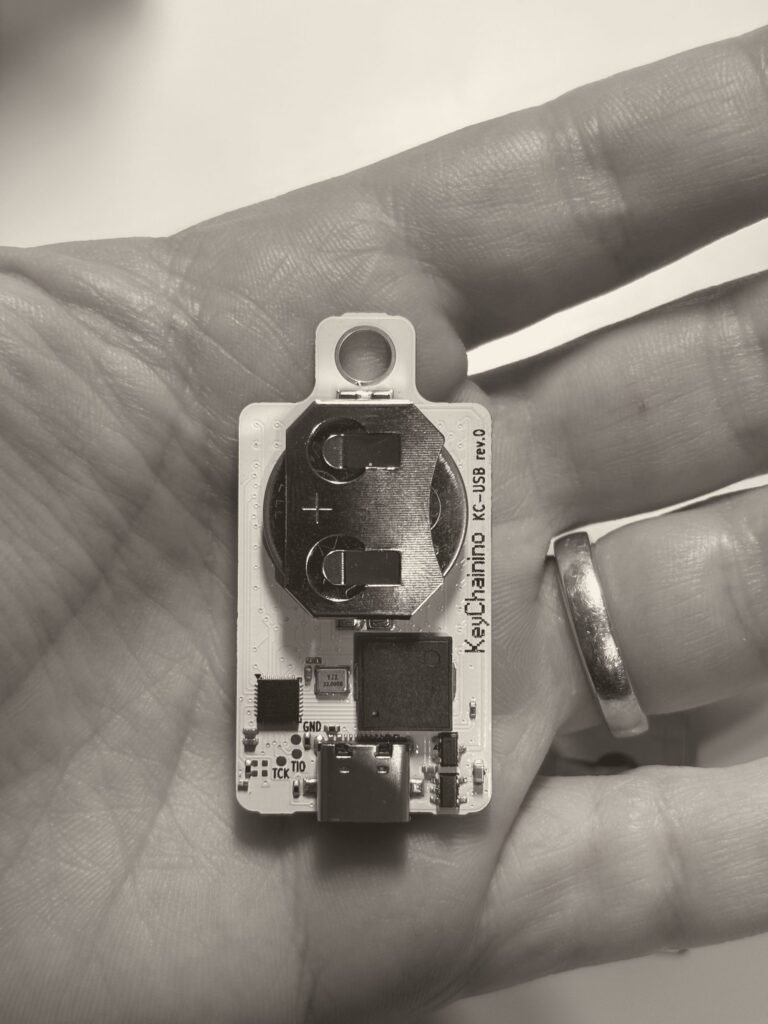
So I plugged in the USB cable, opened the web app – made by the AI – to install the firmware and run the tests and, abracadabra…
It didn’t work.
There. I knew it. So much for trusting AI. It’s not ready for this kind of thing yet. All I did was waste money and time. If I’d known, I’d have done it myself, the old way. By hand. Dammit…
A thousand curses were going through my head when I saw something move on the board.
While I was plotting to destroy every GPU in the world, the AI was at work.
It hadn’t gone the way it wanted: the bootloader wasn’t the one described in the chip’s manual. But it didn’t give up. It rewrote it.
KeyChainino was alive. It greeted me with a little tune and its usual cheeky face.
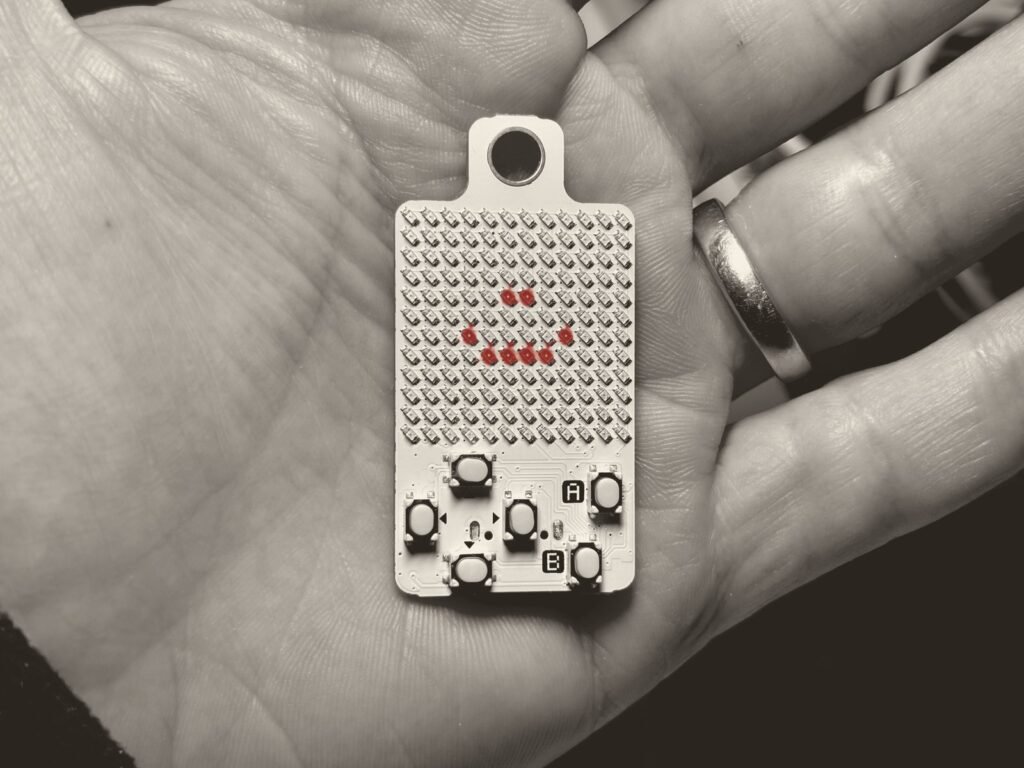
AI beat me once again. AI doesn’t curse. It works.
AI has no ears, but it writes music. AI has no brain, and yet it has one.
And that’s how Claude created the new version of KeyChainino from scratch: KC-USB.
But the surprises don’t end there.
We’re already at rev1, where I had the expensive antenna removed.
«There’s no room.»
Find it.
«Yes, but calm down.»
It managed to fit a printed antenna on the PCB, at no cost, which I’ll be testing on the next boards.
Meanwhile we’re polishing the games, and soon this board will also be available on KeyChainino.com.
Leave a Reply